Image Capture for List-Detail View - Camera/Photo Library
- Configuring Photo Capture to Use the File System
- Image Capture Properties Properties
- Amazon S3 Storage Properties Properties
- Image Upload Target Settings Properties
- Image Thumbnails Properties
- Store Image EXIF Info Properties
- HTML5 Options Properties
- Video Options Properties
- Store Image EXIF Info Properties
- PhoneGap Options Properties
- PhoneGap Message Customization Properties
- Client-side events Properties
Description
This action is used exclusively for image fields in a List Detail View. Capture an image using the camera, or from the photo library. On devices that don't support a camera, select an image from the filesystem.
Used with the UX component
You can build mobile, disconnected applications, that include the ability to capture images using the camera on the device. When running on a device that does not have a camera, the image to use can be selected from the file system.
To create a button to capture a new image for an Image control in a List Detail View use the 'Image Capture for List-Detail View - Camera/Photo Library' action.
For more information on capturing images in the List Detail View, see Creating Disconnected Mobile Applications and search for 'camera'.
Configuring Photo Capture to Use the File System
In order to capture photos in disconnected application you will need a List control with an associated Detail View. Let's assume that the List control is bound to a SQL table that has these fields
- id
primary key
- description
a character field - contain a description of the photo you have captured
- imageChar
a character field that will contain the photo (actually, it will contain the URL that points to the photo - which might be on S3 or on your Alpha Anywhere server).
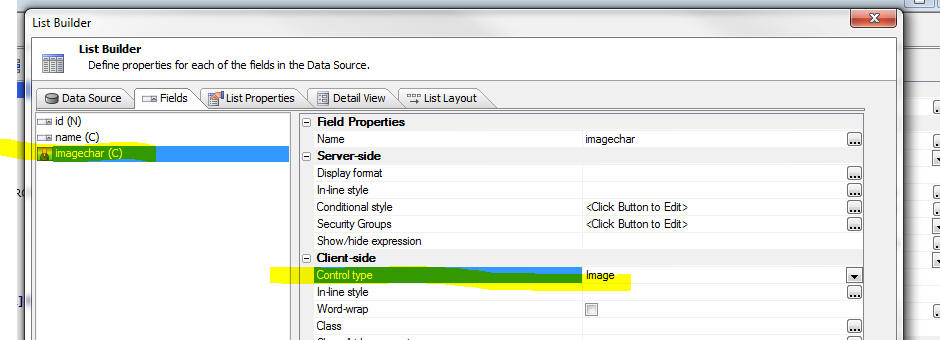
Assume that you have have added a List control that is bound to this table to your UX. The control type for the photo field (imageChar) in the Detail View should be set to Image.
First you will need to edit the List control and go to the Fields pane and ensure that the control type for the imageChar field is set to Image. Since imageChar is a character field the List does not set its default type to Image.
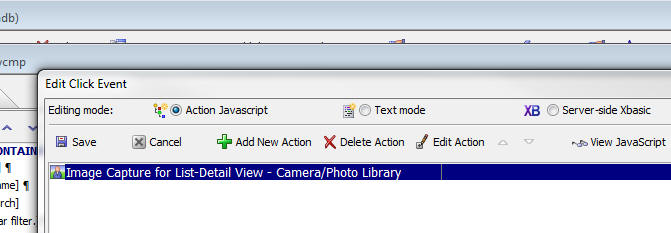
You should then add a button next to this Image control and set the action on this button to Image Capture for List-Detail View - Camera/Photo Library.
When you click the smart field to configure this action, the builder will open as shown below:
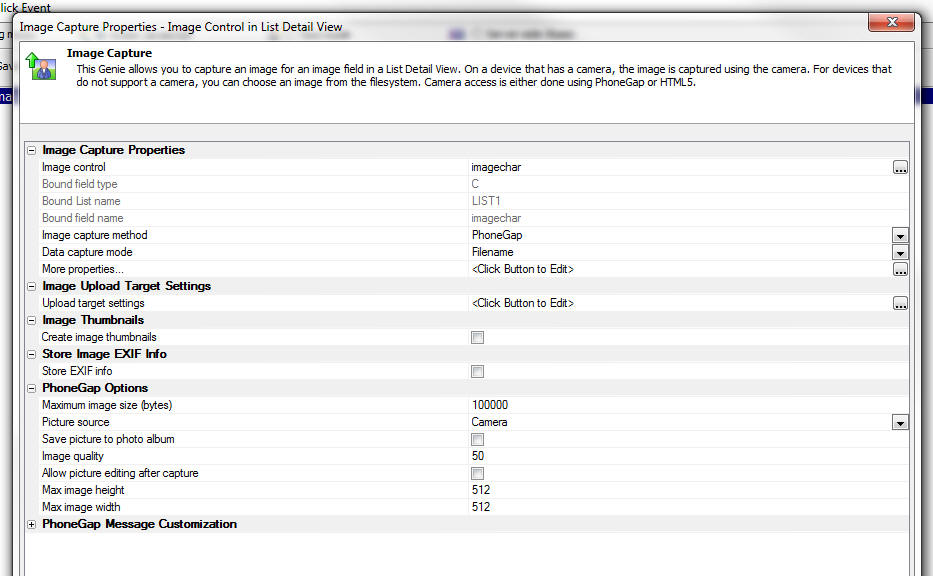
Note that the builder has several properties shown as read-only properties.
In this example, the target field (i.e. the Bound field type) is a character field. Therefore we have the option of uploading the image to either Amazon S3, or the Alpha Anywhere server when the data in the List are synchronized.
Image Capture Properties Properties
Image control
Specify the Detail View image control.
Javascript to execute when image has been captured
After the image has been captured, an optional Javascript event handler can be executed. This event handler can be used to do things such as display the captured image in a placeholder in the app. The following variables are available for use in the event handler:
- Variable
- Description
- e.data
The base64 encoded data with the correct prefix. (example: data:image/jpeg;base64,)
- e.fileSystemURL
The URL for the file where the image is stored on a device. This variable is only available if Cordova was used to capture the image.
This event is often used to update a placeholder that displays the image in an app. For example:
' "picture" is an Image Control in the UX
{dialog.object}.setValue('picture',e.data);
If Cordova was used to capture the image, the file URL can be used instead of the base64 encoded data to display the image in the app.
' "picture" is an Image Control in the UX
{dialog.object}.setValue('picture',e.fileSystemURL);
If you use the Alpha Anywhere version of the Cordova Camera Plug-in (see 'Camera with Exif' in the 3rd party section in the Cordova Builder), the EXIF information for the image is available. The following variables can be used to access the EXIF info:
- Variable
- Description
- options.EXIF.latitude
The latitude where the image was captured.
- options.EXIF.longitude
The longitude where the image was captured.
- options.EXIF.altitude
The altitude where the image was captured.
- options.EXIF.dateTime
The date time information for the image.
- options.EXIF.ExifJSON
A JSON string with all of the EXIF data returned by the camera.
EXIF information is not available if you select a Video from the Photo Library.Bound field type
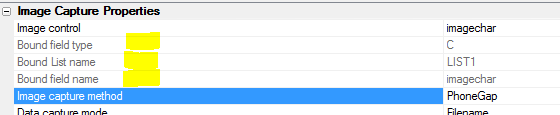
Read only. The Image control in the List's Detail View is bound to a corresponding field in the List control and this field in the List control is in turn bound to a field in the source SQL database. The data type of this field in the SQL database is a character field. As mentioned previously, you can only use the Filename option for the Data capture mode if the photo is bound to a character field in the SQL database.
If the Bound field type is a binary field then uploading the image to Amazon S3 is not an option. The image can only be uploaded to the Alpha Anywhere server.Bound List name
Read only. Name of List control for the data field that is bound to this control.
Bound field name
Read only. The name of the field in the SQL table where the image name will be stored when data from the List are synchronized.
Bound control type
Read only. Type of the control in the List to which this control is bound.
Image capture method
Specify if you want to use HTML5, PhoneGap or PhoneGapPreferred to capture the image. If you select PhoneGapPreferred, the PhoneGap method will be used if the application is running in a Cordova shell, but the HTML5 method will be used if you are running in a browser.
Move file to permanent storage after capture
When an Image file is captured using PhoneGap, the captured file in placed in a temporary storage location that could be cleared when the app is terminated. Therefore, it is advisable to move the file to a permanent location.
File system part
on iOS: 'public' - the application's "Documents directory" - accessible in iTunes file sharing and backed up to iCloud, 'private' - application's private persistent data - deleted when application is uninstalled, 'saved' - similar to 'private', but backed up to iTunes. Choices include saved, private, public.
Folder
Specify the folder in the file system where the file should be stored.
Data capture mode
Filename or Base64 - This prompt only appears if the Image capture method is PhoneGap or PhoneGapPreferred. If you want to store photos in the file system on the device you must use the Filename option.
Maximum image size exceeded Javascript
Specify the Javascript to execute if the user selects an image that exceeds the maximum size. Your Javascript code can reference e.controlName and e.imageSize.
Upload Target (when using PhoneGap)
Specify if the image should be uploaded to the Alpha Anywhere server, or to a cloud storage provider (e.g. Amazon S3).
Upload target settings are actually stored in the List control settings. They are not stored as part of your Action Javascript definition. It is merely a convenience that you can edit the Upload target settings from within this builder. If you open the List builder and go to the Detail View pane, Media and Other Linked Files (Cordova Application Only) section, you will the upload settings.- Upload target settings apply to all image fields in the List (and any child Lists with pre-fetched data that are linked to this List). For example, assume that you have two image fields in your List. You might have one button to capture a photo for the first image and another button to capture a photo for the second image. If both of these buttons are configured to use the Filename option for the Data capture mode, then both of these images will be uploaded to the same target (either the Alpha Anywhere server, or Amazon S3). It is not possible to upload the first image field to S3 and the second image field to the Alpha Anywhere server.
More properties...
(Not necessary if the Upload Target is set to Amazon S3) Allows you to specify the folder on the Alpha Anywhere server where the uploaded images will be stored. Also allows you to specify the name Xbasic functions that will called before and after the file has been uploaded from the device to the Alpha Anywhere server is saved. A typical use case for the beforeUploadedFileSave function is to override the default settings and specify the filename and folder where the file should be stored.
More properties... are actually stored in the List control settings. It is merely a convenience that you can edit these setting in this builder. Open the List builder and go to the Field pane to see the settings for each image field.
Amazon S3 Storage Properties Properties
Method for specifying Amazon S3 credentials and bucket
Should the Amazon S3 credentials and bucket be read from a named storage connection string, or do you want to specify explict values for the access key, secret and bucket. Choices include Named Storage Connection String, Explicit.
Storage connection string
Specify the named storage connection string.
The storage connection string MUST NOT BE ENCRYPTED.To define a storage connection string, go to the Tools menu in the Web Projects Control Panel.Access key
Specify the access key.
Secret
Specify the secret.
Bucket
Specify the bucket.
Authenticated read
Specify if authentication is required to read the object once it has been uploaded to S3
Image Upload Target Settings Properties
Upload target settings
Specify if the image should be uploaded to the Alpha Anywhere server or to Amazon S3.
These settings are stored in the List definition. You can also edit the settings by opening the List builder, going to the 'Detail View' tab and then editing the 'Media and Other Linked Files' property.
Image Thumbnails Properties
Create image thumbnails
Allows you to specify if you want to create thumbnails from the uploaded images. You can only create thumbnails if you are uploading to the Alpha Anywhere server. If you are uploading to Amazon S3, then you cannot create thumbnails.
The Thumbnail definition is stored in the List definition. (Open the List builder and go to the 'Fields' tab.)Thumbnail definition
Define what thumbnails should be created.
The Thumbnail definition is stored in the List definition.
Store Image EXIF Info Properties
Store EXIF info
Allows you to specify if you want to extract EXIF information from the uploaded photo and store that information in fields in the table to which the List control is bound (the 'target' table). This option is only available if you are uploading the photos to the Alpha Anywhere server. It is not available if you are uploading to Amazon S3.
When you turn this option on, the genie allows you to map various pieces of EXIF information to fields in the 'target' table. For example, the target table might have a fields called 'latitude' and 'longitude' and you could map the EXIF latitude and longitude values to the corresponding fields in the target table. There may be quite a bit of data in the EXIF object that is extracted from the uploaded image and you can store the raw JSON string (with all of the EXIF information) in a long character field in the target table.
Depending on the mobile device that was used to capture the photo, and depending on the settings on that mobile device, EXIF information may not be available in the uploaded photo.- The EXIF info definition is stored in the List definition. (Open the List builder and go to the 'Fields' tab.)
EXIF Info definition
Define the type of EXIF info to store in the database.
The EXIF info definition is stored in the List definition.
HTML5 Options Properties
Resize image (if greater than max allowed size)
(Recommended) Specify if the captured image should be resized before it is saved to the List (if it exceeds the maximum allowed size).
Resize image
Specify the policy for resizing the image. Choices include Always, Only If Image Exceeds Max Size.
- Always
The image will always be resized, regardless of its raw size.
- Only If Image Exceeds Max Size
The image will only be resized if the raw image size exceeds the maximum size.
Maximum image size (bytes)
If the image that is captured is bigger than this size, the image will be resized.
Image compression
Specify the image compression factor to use when capturing an image using HTML5.
- Compression Factor
- Description
- 1
no compression
- 0
maximum compression
Max image height
Specify the maximum image height (in pixels)
Max image width
Specify the maximum image width (in pixels)
Video Options Properties
Duration
Specify the maximum length of the video in seconds. Set to -1 if you don't want to specify a maximum value
Store Image EXIF Info Properties
Store EXIF info
When the image is captured, should EXIF data stored in the image be captured?
EXIF Info definition
Define the type of EXIF info capture.
PhoneGap Options Properties
Maximum image size (bytes)
Specify the maximum image size (in bytes) that can be captured. Set to -1 for no limit (NOT RECOMMENDED!).
Picture source
Specify if the image should be captured by using the camera to take a picture, or if the user should select the image from the Photo Library on the device. Choices include Camera, Photo Library.
Type
Specify if the user should select a picture or video from the Photo Library Choices include Pictures, Videos.
Save picture to photo album
When enabled, the image is saved to the device's photo library.
Image quality
Specify the image quality when using Cordova
Allow picture editing after capture
Can the user edit the picture after capturing it?
Max image height
Specify the maximum image height (in pixels)
Max image width
Specify the maximum image width (in pixels)
PhoneGap Message Customization Properties
Image selection canceled message
Image selection canceled message property.
Image selection message close button
Image selection message close button property.
Camera canceled message
Camera canceled message property.
Camera canceled message close button
Camera canceled message close button property.
Client-side events Properties
Before image capture
Specify the Javascript to run before the image is captured. If your code contains 'return false;' then the image capture is cancelled.
On image capture
Specify the Javascript to run once the image has been captured. Your Javascript can reference e.data which is the base64 encoded image. In the case where Cordova is used, you can also reference e.fileSystemURL, the file system URL of the image.
On video capture failed
Specify the Javascript to run if the video capture failed.
See Also